 eMV Partner / Manage Users
Manage Users
As the Organization Administrator, you must add users to organizations by entering their WAMS ID, and then assign them one or more role(s).

- Login to eMVPARTNER and select 'Manage Users'.
- Under Manage Users, you will be able to view, edit, add or remove users and their roles.
Create a User/Add Roles
Create a User:
-
Login to eMVPARTNER and select ‘Manage Users’ under ‘User Management’
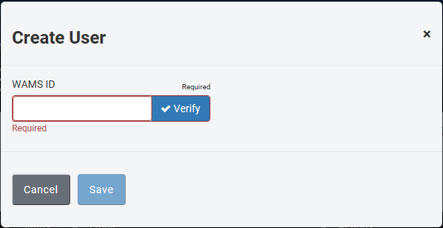
- Click on the 'Create User' button.
-
Enter the user’s WAMSID, click 'Verify'.
-
Change the user status to 'Active'.
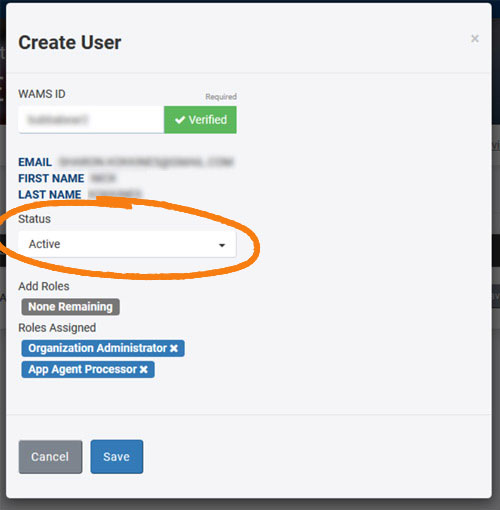
Add Roles:
Roles must be assigned based on what transactions the user will process. Be sure to assign roles.
-
Under 'Add Roles', find the list of possible roles for this user, shown in gray.
-
Click a role to add it, and it will turn blue and show up under 'Roles Assigned'.

- Click 'Save' to save the new user and their roles.
- After clicking 'Save', a User Agreement will automatically appear, if required. It must be signed by the Organization Administrator.
- Both the Organization Administrator and the added user will receive email notification of the requirement for the recently added user to complete and submit the User Agreement by logging into emvpartner.wi.gov.
- When the user logs into emvpartner.wi.gov the User Agreement will automatically display, and the user cannot proceed until successful completion and submission of the User Agreement. The Organization Administrator may view the User Agreement at any time.
- Certifications required for the role(s) assigned to the user may now be taken. Click here for instructions: emvpartner.wi.gov/userinstructions